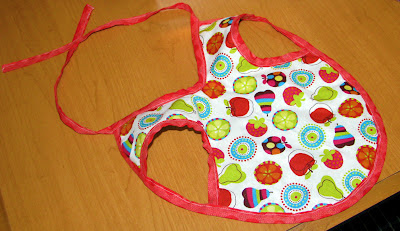
I know you are probably getting sick of the tutorials with the lack of real posts, but we really haven't had much going on We are either sitting at home playing or we are out walking around stores with no money to buy anything. So that is what is going on, now on to the tutorial!!!!!
This is again is a tutorial I got from
Pinterest.
This is the link I followed. You will need to go there for her pattern for the main part unless you thin you can eyeball it. It is free and easy to print so I would just get it from there.
You will need...
1/4 yard of your main fabric
1/4 yard flannel or canvas(this is for sturdiness)
One 34x1.5 inch for bias tape
One 31x1.5 inch for bias tape
Two 10x1.5 inch bias tape
1/4 yard plastic fabric
(this is optional, the tut I followed didn't, but I thought it would be a nice touch so your child's clothes won't get wet)
Thread
The hardest part of this is making the Bias Tape. I do have a little trick though. This may be a thing all real sewers know, but I thought it was pretty ingenious. Cut out a template from a cereal box. I made mine 1inch thick because I was making a 1.5inch Bias Tape.
Now after you cut out your bias tape and you are ironing the bias tape you put your template in the middle of the fabric and fold over the edges an iron them down. Believe me it makes it much easier than trying to do it by hand just eyeballing it.
After ironing the edges in then you fold them in half and iron them flat. You should end up with them looking like the strips in the above picture.
Now using the pattern found
here you cut out one from all of your fabrics. Now sandwich them together, pin and sew around the edges to hold them together.
Now your going to take your two 10 inch bias tape and pin them in the "arm pit" part of your bapron.
Sew.
(Be careful to make sure when your sewing the bias tape you sew the front and back of it to the main fabric. I missed a couple time and had to go back over it. Oh and by the way if you don't know, you stick the main fabric into the open side of the bias tape so that there is the accent color on both the front and back of the main fabric. The bis tape is meant to hold in all the raw edges.)
The next part you need to pay attention. Take the 31 inch bias tape and pin it to the shoulder parts of the bapron. (make sure its NOT twisted).
Then you need to fold the bapron in half to find the middle of the bottom and fold the bias tape in half to find the middle of it. Now pin them together and pin the rest of the bottom together. Should look like the picture above.
Sew around the entire thing.
Find the middle of the last remaining 34 inch bias tape. pin it to the neck part of the bapron.
Sew the rest of it and you will get...
A Bapron! The baby apron!!!
Isn't she so cute in it!
It was really easy and didn't take very much time to make.
Sew enjoy!


